
If there’s one thing we’ve learnt from our extensive travel is not to dismiss any small problems that arise with our camper trailer. Having travelled all around Australia, we are drawn to some of the more remote regions year after year. Visiting places such as WA’s Kimberley and west coast, and other areas like the Gulf and Cape York have been major travel drawcards. And with our next adventure taking us into the Gibson Desert, it’s really important our camper trailer is in tip top condition because it’s the last place we want it to let us down.
So that’s why we take any small issues seriously. What was a minor problem at the time could easily turn a good trip into a disaster if it fails in the middle of nowhere on the next trip. We record any issues as they occur when travelling and add them to our next maintenance schedule before heading off again.
Here’s a look at the top ten maintenance items we focus on to ensure we have trouble free camper trailer touring.
1. Clean & Visual Inspection
Start with cleaning and blast your camper with a pressure washer using a truck wash cleaner. Make sure to clean underneath including the suspension and in and around the seals. It’s a great way to find water leaks! Follow up with a hand wash as it enables you to check fittings, doors, hatches and openings more closely.
Next, arm yourself with a spanner and screwdriver. Starting from underneath the trailer, swing on every nut, bolt and screw to ensure they are tight. If any are loose, stop and investigate the reason and add it to your list of things to rectify.

Kitchen and cooking items need to be inspected. Check gas bottles for compliance, the condition of gas hoses and the regulator. Review the kitchen contents to ensure to you are travelling with the right gear and not carrying unnecessary weight.
Move to the trailer’s tent and look over your awning poles, check you’ve got enough pegs, and inspect the condition of rope ties. Remember to check the condition of your bed’s mattress and tables and chairs.
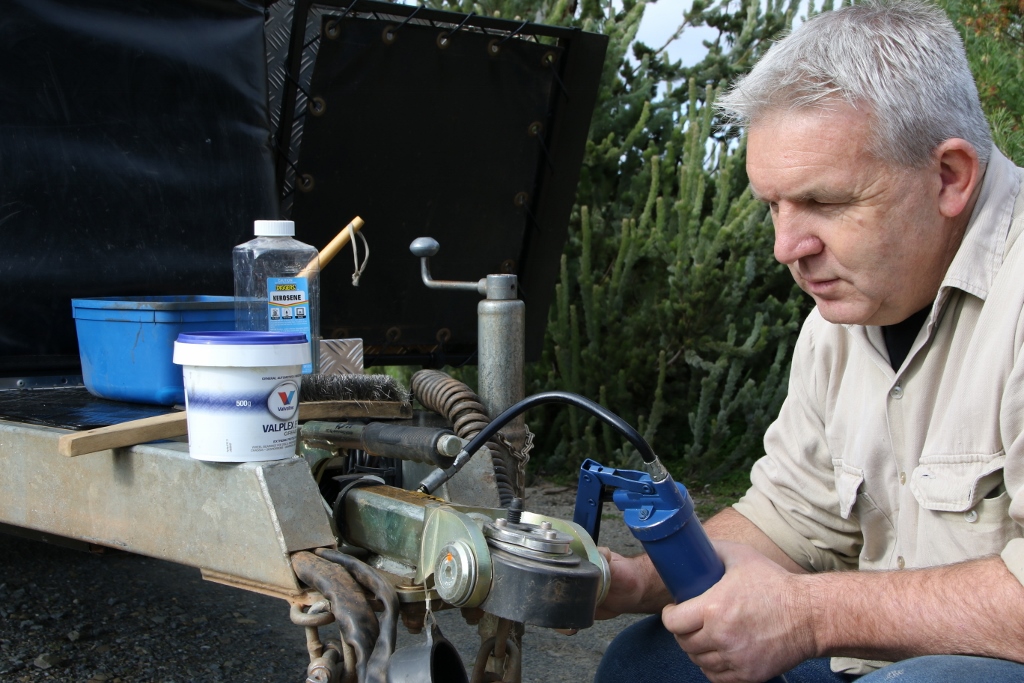
2. Hitch
Give your vehicle’s hitch the once over and look for any signs of marks or gouges in the coupling ball/pin. Then inspect the trailer’s A frame hitch and clean it with a mild solvent. Use a spanner to check all attachment bolts and inspect safety chain welds for any cracking. Lubricate all moving parts with water repellent grease. If there is grease nipples ensure they are in good working order and add grease. Leave a thin film of lubricant on any moving coupling parts. And while you’re at it, the jockey wheel should get the same treatment.
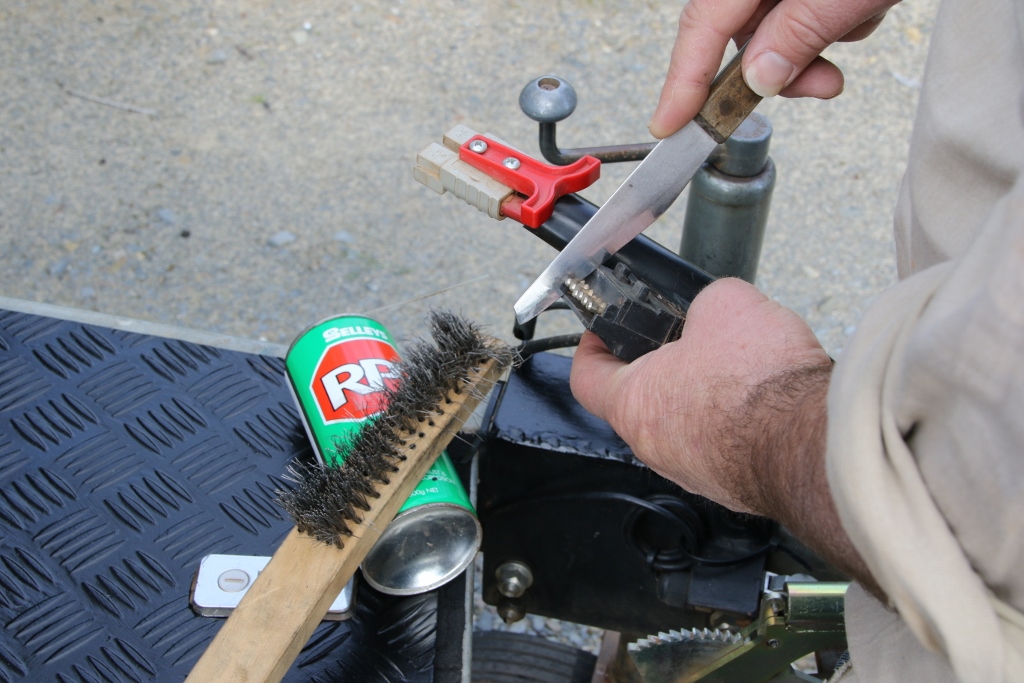
3. Electrics Connector & Lights
Inspect the electrical couplings for any signs of cuts/nicks as these can take a beating. Use a slight tugging motion to ensure no loose connections and clean with a stiff brush. Use electrical water repellent such as WD40 or similar on the electrical pins, Anderson plug and camera connectors, if fitted. Repeat the process for the vehicle’s connector and then plug in together.
Load the electrical circuit by switching on all lights to ensure they work. At the same time, have another person pull, push and twist the wiring couplings to simulate harsh driving conditions. If you have electric brakes fitted, check solenoids are operating.
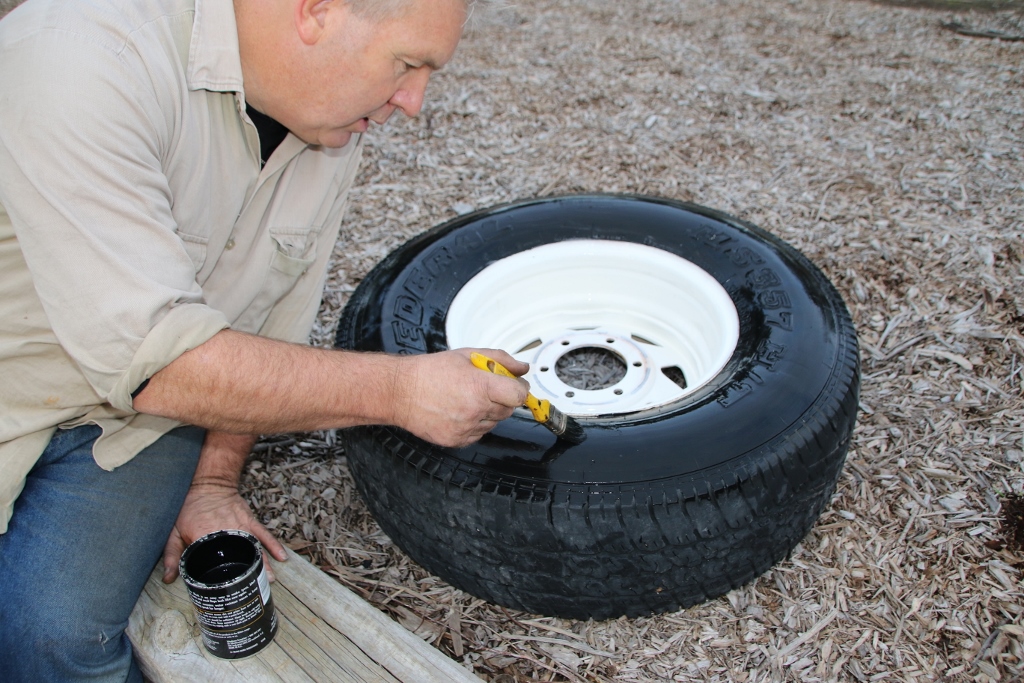
4. Wheels & Tyres
Connect the trailer to the vehicle and remove a trailer wheel whilst it’s on a safety jack. Clean and inspect the tyre carefully on both side walls for any marks, cuts or nicks. Check the tread depth is still adequate. Often the valve stems can take a beating from stones so inspect these carefully. Remove the valve caps and check for leaking before checking pressures. This is a good opportunity to deflate the tyres to 18psi to ensure the valve is seating well and then reinflate to maximum pressure. Also inspect the wheel for any damage. Steel wheels will look new again with a quick touch up of paint while they’re off. Lastly, paint tyres with tyre black for that professional finish and UV protection. Repeat this process for your other wheel plus the spare.
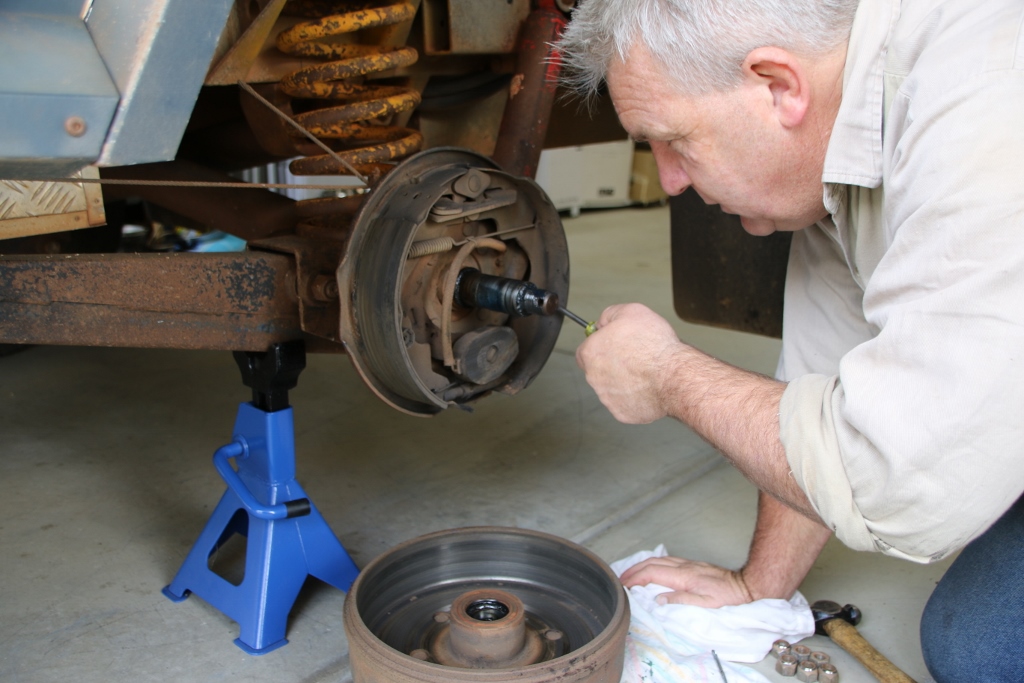
5. Bearings Stub Axle
Now is a good time to check the stub axle area, the electric brakes and bearings. If you’re unsure how to adjust electric brakes and apply bearing adjustments, it’s best to leave this job for a professional. After a visual inspection, use spanners to check nuts and bolts are tight. Remove the hub and check for signs of scoring/marking as small stones can often get in and make a real mess. Reinstall the brake drum if it all looks good. Refit the nut and apply the appropriate adjustment before refitting the pin.
6. Suspension
Take a good look at the suspension system while the wheels are still off. Use a spanner to check tightness. Grab the shockers (if installed) and give them a bit of a shake and twist to feel for movement in the bushes. Also look for signs of oil leaking around the tubes. The only real way to give them a good check is to remove them and feel for their rebound firmness against an object (this may best be left to your service agent). Look for any signs of cracks in the leaves if leaf springs are fitted. Lubricate where grease nipples are present and shackle hangers.
7. Water Tanks
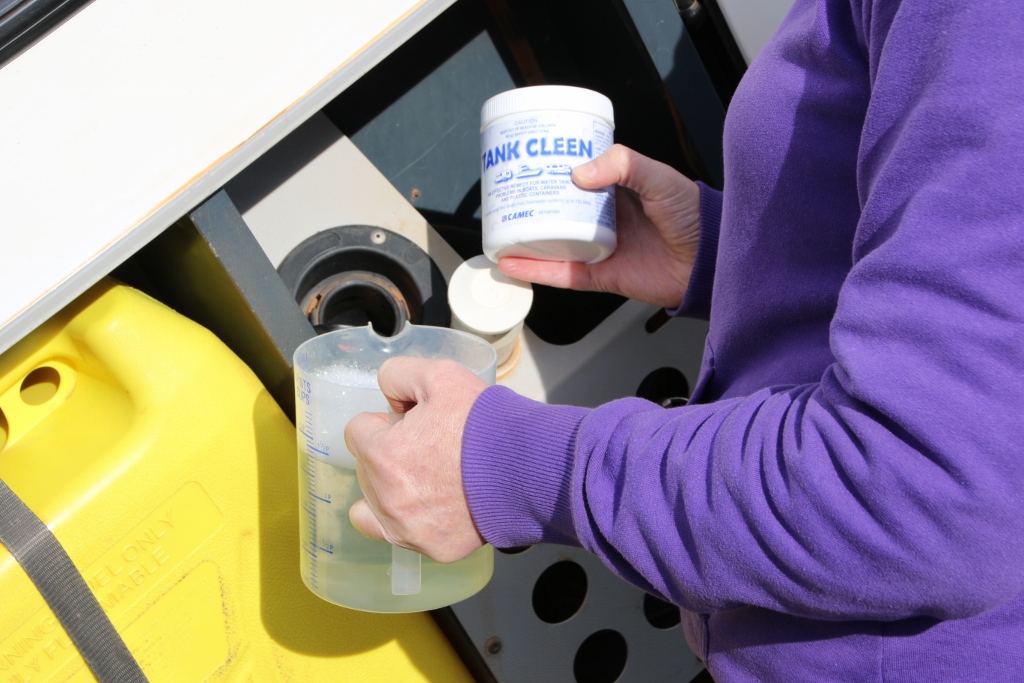
It’s a good idea to periodically flush and clean out any water tanks. Check hoses and connectors for kinks and leaks. Run any pumps to inspect water cleanliness and conduct a taste test. You can purchase solutions to add to your tank water to improve its overall wellbeing from camping shops.
8. 12 Volt Systems
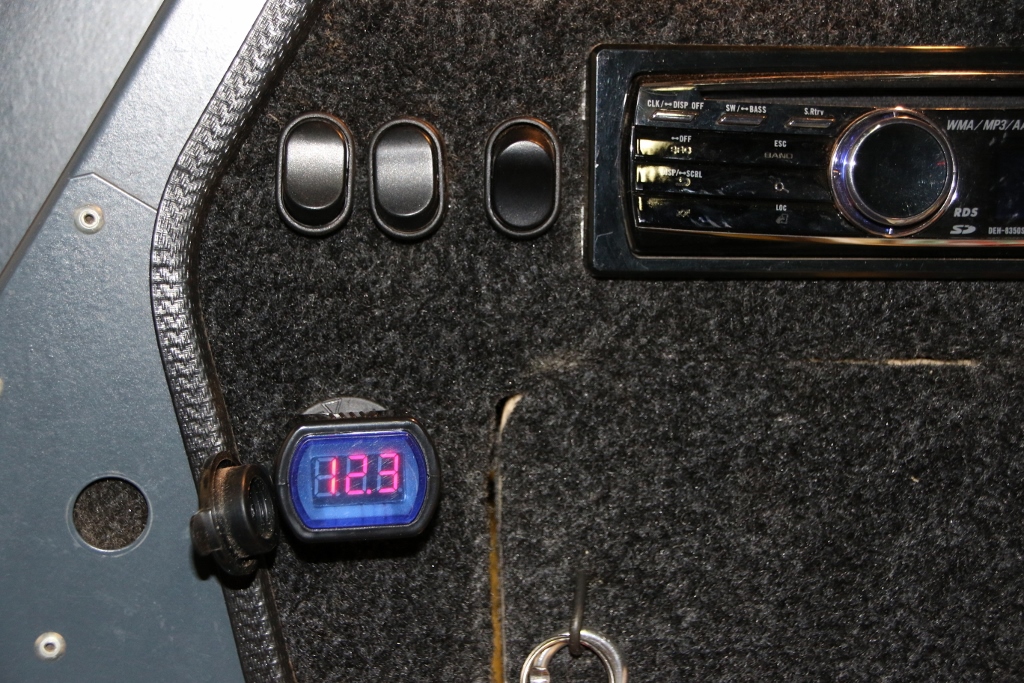
Don’t expect to get a good life out of your camper’s battery if it’s neglected. Perform a simple check to ensure it’s charged at all times and terminals are tight and free from dust, grime and sulphation. The level of testing you can perform on the circuits will depend on the complexity of the system and your knowledge. Start by turning everything on and off. Plug in a 12 volt cig gauge and leave some load on for a couple hours. The volts should drop over time. With your vehicle connected to your trailer, start up and you should see the volts begin to climb back up (assuming your vehicle is wired to recharge your house batteries). Remember to fully charge the batteries again.
9. Canvas Care
Modern day canvas doesn’t require a lot of cleaning maintenance. Stay clear of detergents or solvents to clean the canvas as you will remove its water repellent properties. Start with a warm, sunny day and assemble the canvas tent area. Use a garden hose and apply minimal pressure to squirt the canvas area to remove dust and grime. Check all seams and pooling areas for possible leaks. Leave it to completely dry in the sun before putting it away. There are waterproofing agents available to rejuvenate canvas for water repelling capabilities. Consult a reputable camping shop or upholstery canvas supplier before purchasing and follow the directions.
Use a small nail brush or old toothbrush with some warm soapy water on zips. Apply a dry lubricant such as silicon spray once dry. Alternatives include a lube dry stick of grease, graphite powders or even a lead pencil. The zip sliders will eventually wear out, so you may need to visit an upholstery shop for replacements.

10. Finishing Off
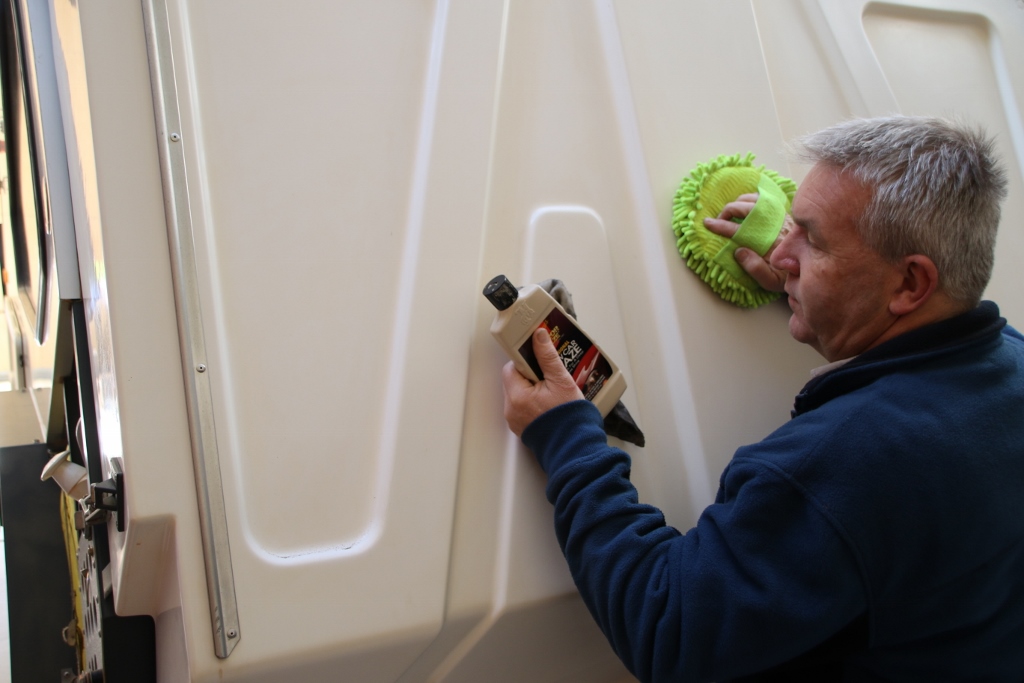
Whether your camper has painted steel work, polished aluminium, or fibreglass, give it the once over with some polish and wax treatment to make it sparkle. It’s so much easier the next time you clean as dirt won’t stick as easily!
Our Top Tips:
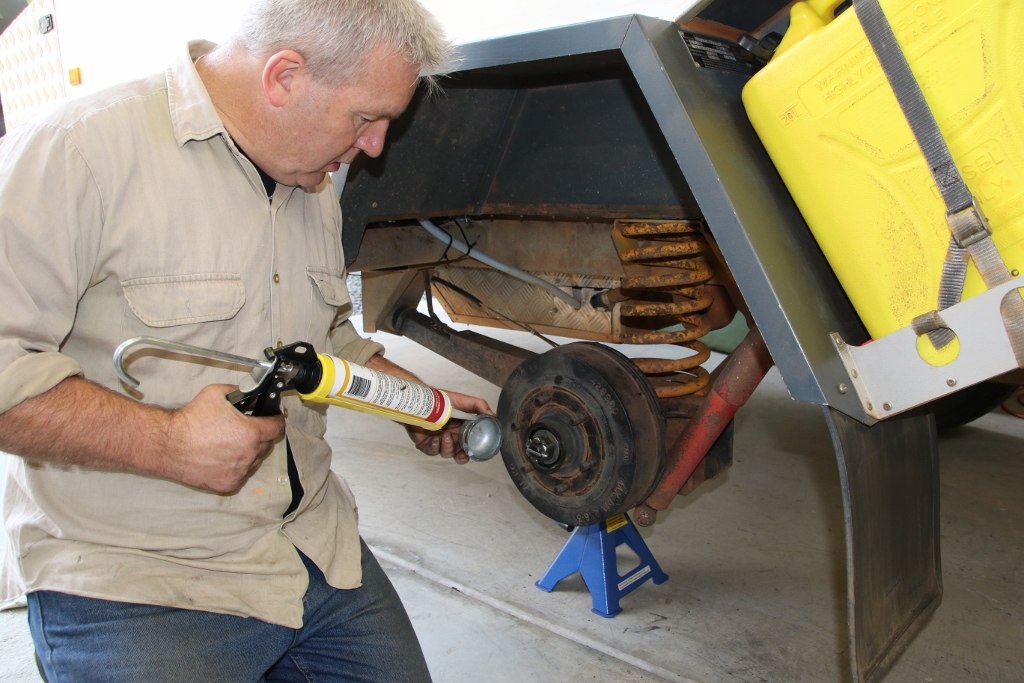
- Add silicon adhesive to the wheels’ dust shield cap to help seal the area and to prevent it getting knocked off when travelling on dirt roads.
- Don’t overtighten the shackle bolts on leaf springs as they still need to move. Use new nyloc nuts if you undo them or Loctite at the very least.
- When refitting trailer wheels and tyres, loosely tighten them up when it’s on the jack. Then when they’re back on the ground, use a torque wrench and apply a cris-cross sequence to tighten correctly.
- Add some water tank cleaning agent to a half tank of water on the way home from your next adventure so it sloshes around when travelling. At home, drain and flush with clean water. Refill the tank completely so no bacteria can grow in air pockets.
- Always carry spare fuses with you in case you need them when travelling.
With all the hard yards our camper has done, it’s only natural to provide it with the care it deserves. And once all the jobs are done, it’s ready to meet the challenge of our next adventure when we hit the tracks!
Catch you next time!
Grant & Linda